From Pixels to Polygons: Transforming Single Images into 3D Reality with Gen3R
What is From Pixels to Polygons: Transforming Single Images into 3D Reality with Gen3R
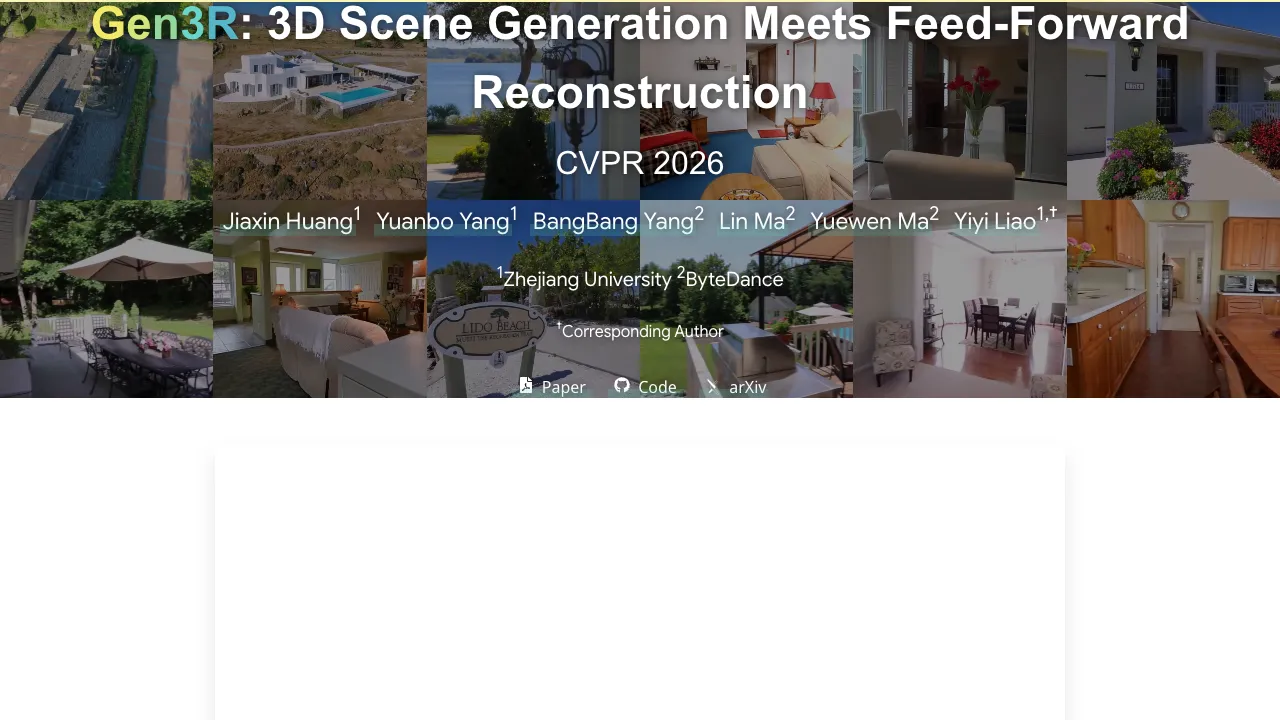
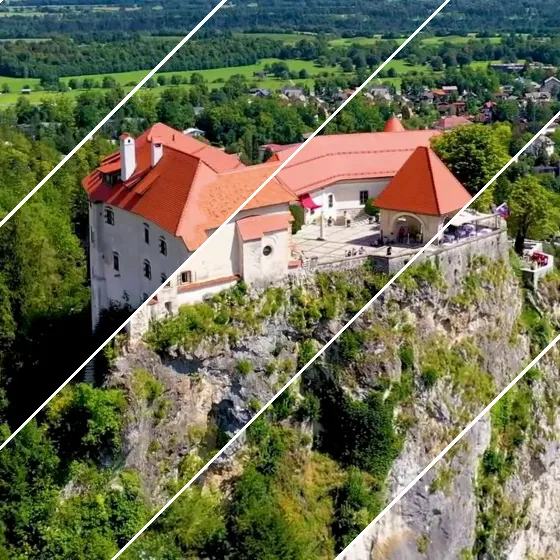
From Pixels to Polygons: Transforming Single Images into 3D Reality with Gen3R is a research project that turns one or more images into both a short RGB video and 3D scene data. It can create camera poses, depth maps, and a global point cloud from simple inputs. It works for single images, two images (first and last), and full image sets.
Gen3R connects two worlds: fast “reconstruction” models that read structure from pictures, and “video diffusion” models that make realistic RGB frames. By aligning their hidden codes, it creates strong 3D results and clear RGB at the same time.
From Pixels to Polygons: Transforming Single Images into 3D Reality with Gen3R Overview
| Item | Detail |
|---|---|
| Project Name | Gen3R: 3D Scene Generation Meets Feed-Forward Reconstruction |
| Type | Research project and open-source code |
| Purpose | Create both RGB video and scene-level 3D (camera poses, depth, point cloud) from one or more images |
| Inputs | Single image, two images (first and last), or many frames |
| Outputs | RGB video, camera poses, depth maps, global point cloud |
| Main Idea | A unified latent space that aligns geometry and appearance across a reconstruction model and a video diffusion model |
| Key Tasks | First Frame to 3D (1view), First-last Frames to 3D (2view), 3D Reconstruction: All Frames (allview) |
| OS/Env | Debian 12, CUDA 12.4, Python 3.11, PyTorch 2.5.1+cu124 |
| Model Weights | Pretrained checkpoint from Hugging Face (local download required) |
| TL;DR | Gen3R creates multi-quantity geometry with RGB from images via a unified latent space that aligns geometry and appearance. |
For broader guides and new tools we cover, see our main hub at Omnihuman 1.Com.
From Pixels to Polygons: Transforming Single Images into 3D Reality with Gen3R Key Features
-
Single to 3D: Turn a single image into a 3D scene with RGB frames, camera poses, depth, and a point cloud.
-
Two-frame to 3D: Use a first and last image to add motion cues and get better 3D.
-
All-frames to 3D: Feed many frames to focus on accurate 3D reconstruction.
-
Unified latent space: Aligns geometry codes and appearance codes so RGB and 3D match well.
-
Scene-level output: Works at the scene scale, not just single objects.
-
Strong results: Tests show state-of-the-art results on single and multi-image setups.
From Pixels to Polygons: Transforming Single Images into 3D Reality with Gen3R Use Cases
-
Creative previews: Turn a sketch or photo into a 3D scene preview with camera paths.
-
Education and demos: Show both RGB motion and the 3D structure that made it.
-
Content creation: Build 3D backdrops and quick scene ideas from just a few images.
-
Robotics and AR tests: Use depth maps and camera poses to try ideas fast.
-
Research: Study how aligned latents affect RGB and geometry quality.
How It Works
Gen3R has two parts that work together. One part reads structure (geometry) from images. The other part makes RGB frames like a short video.
The team trains an adapter that turns the reconstruction model’s tokens into “geometry latents.” These are pushed to align with the “appearance latents” from a pre-trained video diffusion model. When both sets of latents are made together, the system outputs RGB frames and 3D data that agree.

The Technology Behind It
-
Reconstruction side: The project repurposes the VGGT reconstruction model to make geometry latents. An adapter is trained on VGGT tokens.
-
Video side: Pre-trained video diffusion models provide appearance latents that guide RGB.
-
Alignment: Training regularizes geometry latents to line up with appearance latents. This makes both outputs agree.
-
Outputs: RGB videos, camera poses, depth maps, and a global point cloud.
-
Tasks: 1view (First Frame to 3D), 2view (First-last Frames to 3D), allview (3D Reconstruction: All Frames).
If you like company deep-s around AI video and creation tools, see our Bytedance overview.
Installation & Setup
We train and test our model under the following environment:
- Debian GNU/Linux 12 (bookworm)
- NVIDIA H20 (96G)
- CUDA 12.4
- Python 3.11
- Pytorch 2.5.1+cu124
Clone this repository
git clone https://github.com/JaceyHuang/Gen3R
cd Gen3R
Install packages
conda create -n gen3r python=3.11.2 -y
conda activate gen3r
pip install -r requirements.txt
(Important) Download pretrained Gen3R checkpoint from HuggingFace to ./checkpoints
sudo apt install git-lfs
git lfs install
git clone https://huggingface.co/JaceyH919/Gen3R ./checkpoints
Note: At present, direct loading weights from HuggingFace via from_pretrained("JaceyH919/Gen3R") is not supported due to module naming errors. Please download the model checkpoint locally and load it using from_pretrained("./checkpoints").
Getting Started: Run Inference
Run the python script infer.py as follows to test the examples
python infer.py \
 --pretrained_model_name_or_path ./checkpoints \
 --task 2view \
 --prompts examples/2-view/colosseum/prompts.txt \
 --frame_path examples/2-view/colosseum/first.png examples/2-view/colosseum/last.png \
 --cameras free \
 --output_dir ./results \
 --remove_far_points
Some important inference settings below:
- --task: 1view for First Frame to 3D, 2view for First-last Frames to 3D, and allview for 3D Reconstruction.
- --prompts: the text prompt string or the path to the text prompt file.
- --frame_path: the path to the conditional images/video. For the allview task, this can be either the path to a folder cont
Performance & Showcases
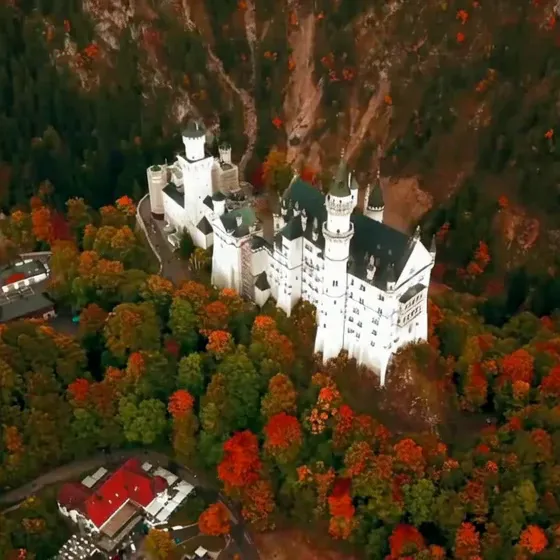
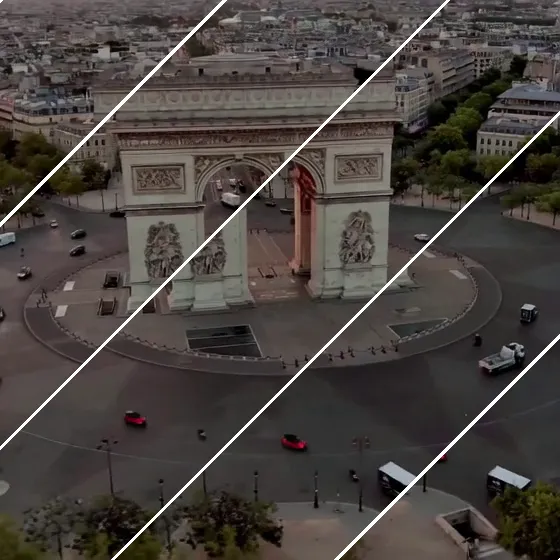
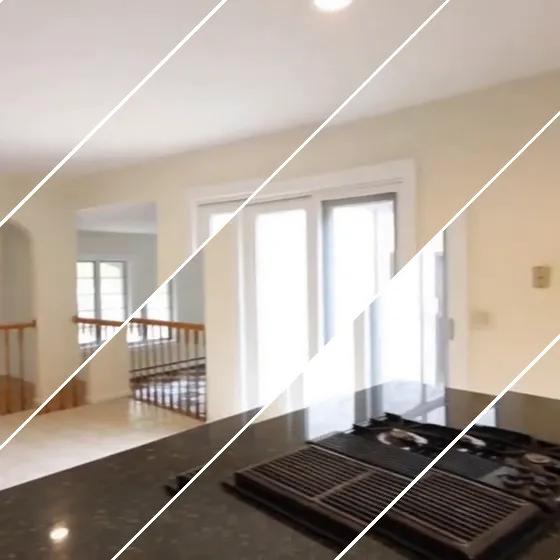
Showcase 1 — Demo video This is the Demo video that gives a quick feel for the pipeline and outputs. You can see how images turn into both RGB and 3D results in one pass.
Showcase 2 — TL;DR: Create multi-quantity geometry with RGB from images via a unified latent space that aligns geometry and appearance. This short summary clip states the core idea: “TL;DR: Create multi-quantity geometry with RGB from images via a unified latent space that aligns geometry and appearance.” It shows both geometry and RGB come from the same aligned codes.
Showcase 3 — 3D Generation: First Frame to 3D Scene 1 Scene 2 Scene 3 Scene 4 3D Generation: First-last Frames to 3D Scene 1 Scene 2 Scene 3 3D Reconstruction: All Frames to 3D Scene 1 Scene 2 Scene 3 This comparison video shows “3D Generation: First Frame to 3D Scene 1 Scene 2 Scene 3 Scene 4 3D Generation: First-last Frames to 3D Scene 1 Scene 2 Scene 3 3D Reconstruction: All Frames to 3D Scene 1 Scene 2 Scene 3.” It stacks tasks side by side so you can see how inputs affect results.
Showcase 4 — 3D Generation: First Frame to 3D Scene 1 Scene 2 Scene 3 3D Generation: First-last Frames to 3D Scene 1 Scene 2 Scene 3 3D Reconstruction: All Frames to 3D Scene 1 Scene 2 This “More Results” video lists “3D Generation: First Frame to 3D Scene 1 Scene 2 Scene 3 3D Generation: First-last Frames to 3D Scene 1 Scene 2 Scene 3 3D Reconstruction: All Frames to 3D Scene 1 Scene 2.” It gives extra scenes to judge quality.
Showcase 5 — Loading interactive demo... You can try outputs in an interactive viewer. The label says “Loading interactive demo...” as the live sample prepares.
Practical Workflow: From Input to Output
-
Pick your task: 1view (one image), 2view (first and last), or allview (many frames).
-
Set prompts: Provide a text prompt string or a file path for your prompts.
-
Provide frames: Give the path to the image(s) as shown in the command above.
-
Run the command and wait: The script will write RGB, camera poses, depth, and a point cloud to your output folder.
-
Review results: Check videos and 3D files for quality.
If you want to know who we are and what we cover, you can learn more about us here.
Why This Matters
RGB and 3D often do not match well. Gen3R addresses this by aligning the parts that create appearance and the parts that create geometry.
This makes the outputs agree better and supports single or multi-image input. It also helps reconstruction by using strong generative priors.
FAQ
What do I need to run Gen3R?
You need a Linux machine with CUDA support and a modern NVIDIA GPU. The team used Debian 12, CUDA 12.4, Python 3.11, and PyTorch 2.5.1+cu124. Make sure to install git-lfs to pull the checkpoint.
How do I get the model weights?
Use git-lfs to clone the checkpoint into ./checkpoints. The exact steps are in the Setup section above.
Can I load weights directly from Hugging Face with from_pretrained("JaceyH919/Gen3R")?
At present, direct loading weights from HuggingFace via from_pretrained("JaceyH919/Gen3R") is not supported due to module naming errors. Please download the model checkpoint locally and load it using from_pretrained("./checkpoints").
What types of outputs does Gen3R produce?
It outputs RGB videos, camera poses, depth maps, and a global point cloud. These come from one pipeline so they match each other well.
Which input modes are available?
There are three: First Frame to 3D (1view), First-last Frames to 3D (2view), and 3D Reconstruction (allview). Pick the one that fits your data.
Image source: From Pixels to Polygons: Transforming Single Images into 3D Reality with Gen3R